When I worked for Bulldog Creative Services, there were some sites that I would be tasked with creating that focused on blog content and while WordPress is big on being a blog platform we sometimes went with ExpressionEngine depending on the client and what they needed. When it came to dealing with health content and site's that attorneys used, we went with ExpressionEngine because of how easily we could boost SEO and performance and also because of how secure ExpressionEngine is.
We had a project for a local Attorney's firm in Huntington, WV to recreate a site that sometimes produced 1-3 blog posts a week. The blog posts were written by several attorneys of the firm where you could filter by author, category and search. We decided ExpressionEngine would be best used for this site. This was when ExpressionEngine version 5 was current.
The firm had a company that revised the content, provided images and directed where we would add meta titles, descriptions, image alt tags, etc. This allowed myself to get kind of creative with blog posts and how I would use them in the future.
For sharing data, I needed to target the Open Graph tags in my main layout for each page and blog posts. The {layout} tag works perfect for this.
ExpressionEngine - Template Layouts

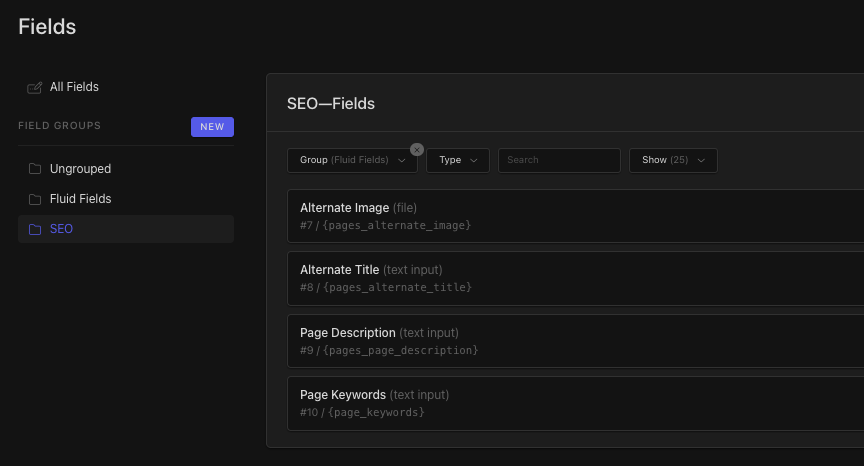
First, I'll start out by creating the channel fields I need and assigning them to the Blog channel. I've added a field for an Alternate Share Image, Alternate Title, Meta Description and Keywords. The purpose of creating an alternate sharing image and title is to allow the author more flexibility in customizing how it appears when the blog post is shared. Otherwise, the post would use the hard coded og:image and blog post title.
Also, I like to keep the shorthand names of fields as short as possible to keep my templates as dry as possible. It's just a form of habit, but these are particularly long.
This might seem strange to some, but there have been several instances where I've needed to shorten a blog title or description so important parts appear in a shared post on Facebook for example. I've also had authors request to use different images for the shared post. Also, odd sizes of images sometimes cause the size of the shared post to look odd. Overall, it helps the author achieve exactly how they want their post to look like on social media sites.

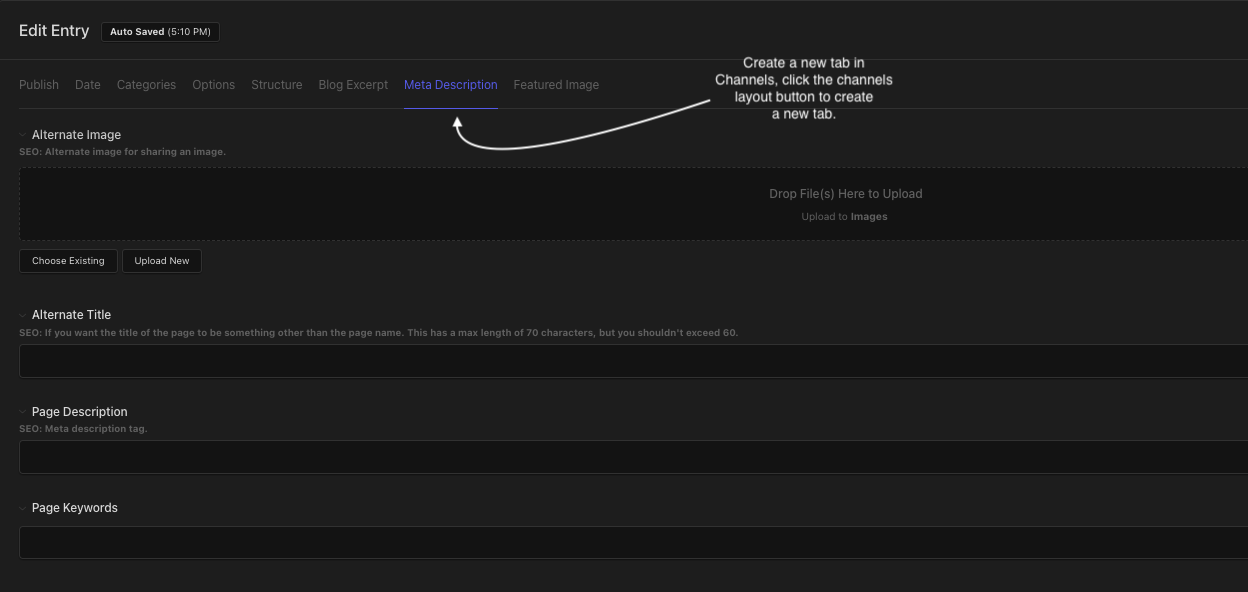
For the sake of making this a little more organized, I'll create a new tab in the Channel Layouts for Meta Description.

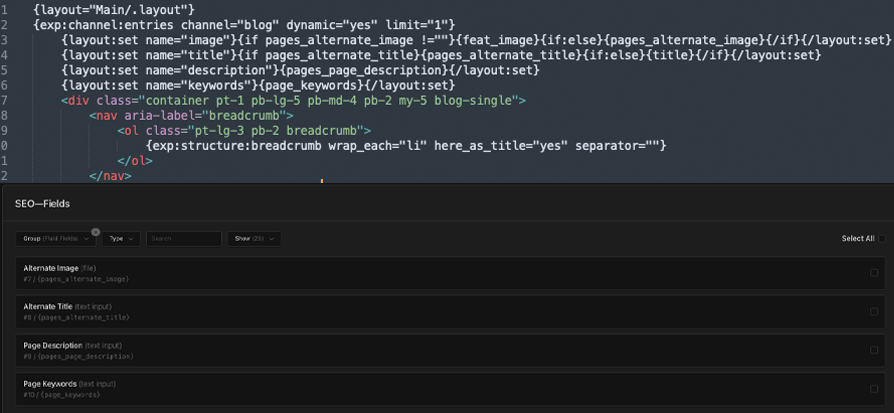
I'll then take the template that I'm using for the single blog post and start setting these channel fields I've created under the channel field declaration (As pictured above).
We can use {layout:set name=""} to create variables that will correspond to our main layout template where we include the meta tags.
{layout:set name="image"}{if pages_alternate_image !=""}{feat_image}{if:else}{pages_alternate_image}{/if}{/layout:set}
I've used some conditionals between the opening and closing layout tags to indicate if a page image is not chosen, then it will use the featured image that I've created a field for. Also, if an alternate page title is not chosen, then the blog title will be used in the social media post.
name="image", name="title", name="description" and name="keywords" are the variables I'll use in the <head> of my main layout template.
Finally, I'll go ahead and declare these meta tags in my .layout template.

From the .layout, I can target those variables in my metadata like so: {if layout:keywords != ''}<meta name="keywords" content="{layout:keywords}">{/if}.
I've included conditionals in the layout because for some, if there is nothing entered in that particular field then I'd rather there be nothing at all OR something in place for it rather than others. I know the above image looks a little unorganized, but when I do work on certain things, part of the template always seems to change based on what I'm building. Either way, this works very well for customizing your own meta data for each page or post.
Lastly, it is good to test and preview your post to see how it appears, so I've always used Facebook's Debugger tool to see how everything looks before sharing. Of course, previewing the link on Facebook's actual site is possible. This is a neat little tool to use as it will inform you of open graph tags that you might be missing. Just paste the link and hit debug and Facebook will crawl that post's meta information.
Sharing Debugger - Facebook


